


How to Install an 11MODE Exhaust Controller
Turn your exhaust to 11 in minutes! Installation by a qualified professional is recommended.
- Plug and play, no wires
- No tools needed
- Remote already paired
Before you install an exhaust valve controller
It is recommended to leave your car locked and completely off for 10+ minutes with your keys away before unplugging the connectors, to allow time for the car to completely shut off.
If the car is not fully powered off it may store an error or CEL (FAQ) that will need to be cleared.
Install guide
-
Step 1
Locate exhaust valve/s
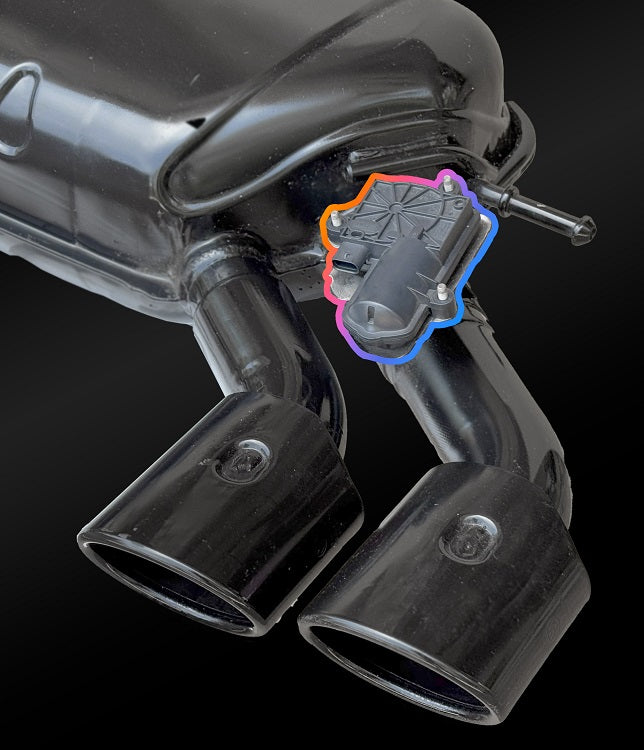
Locate the exhaust valve motor and connector.
Depending on the model, you should be able to access them with the car on the ground, otherwise you may prefer to use ramps. Be sure to follow all safety precautions set by the equipment manufacturers.
On some models, you may need to remove plastic trim panels to access the valve motors.
-
Step 2
Unplug connector
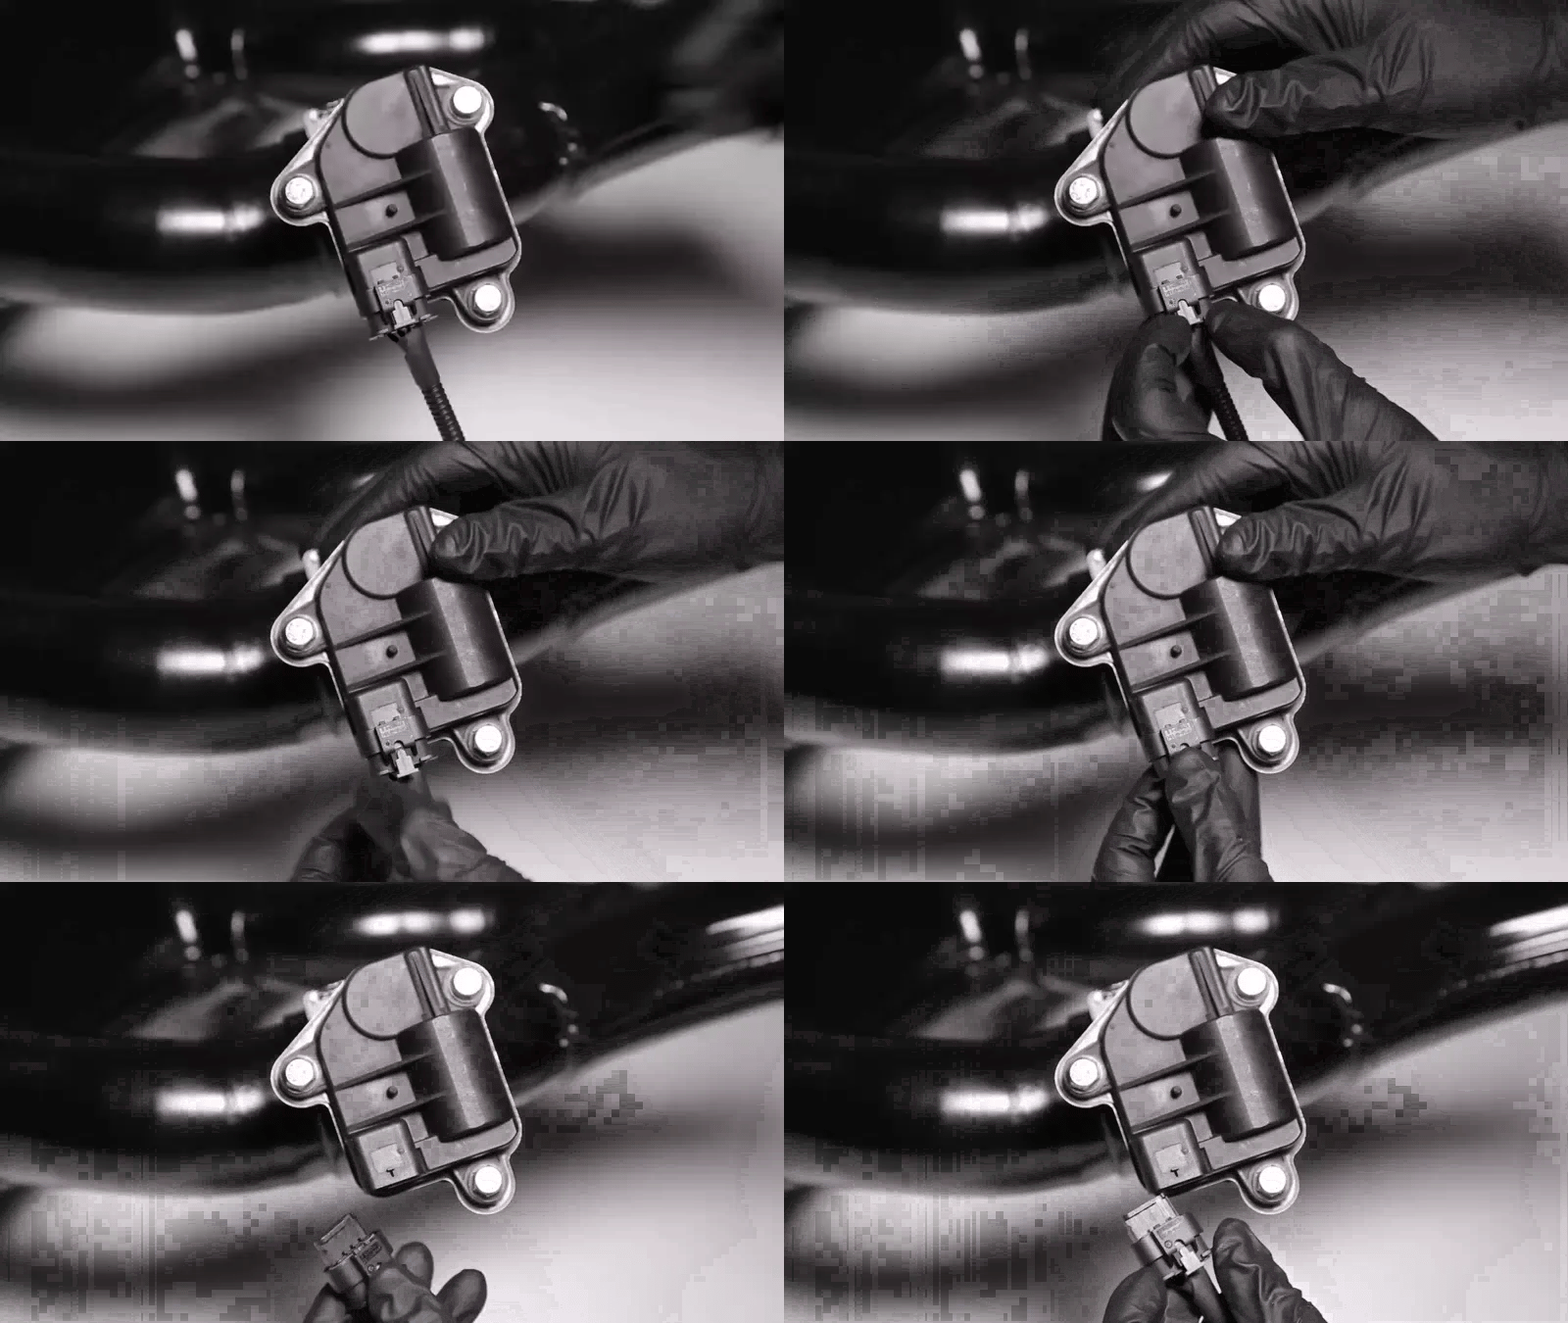
With the car completely powered off, disconnect the factory connector.
(Your connector may look different to the connector shown.)
Most connectors have a locking tab that has to be released first. Then pinching the connector will allow it to be removed.
-
Step 3
Plug in connector
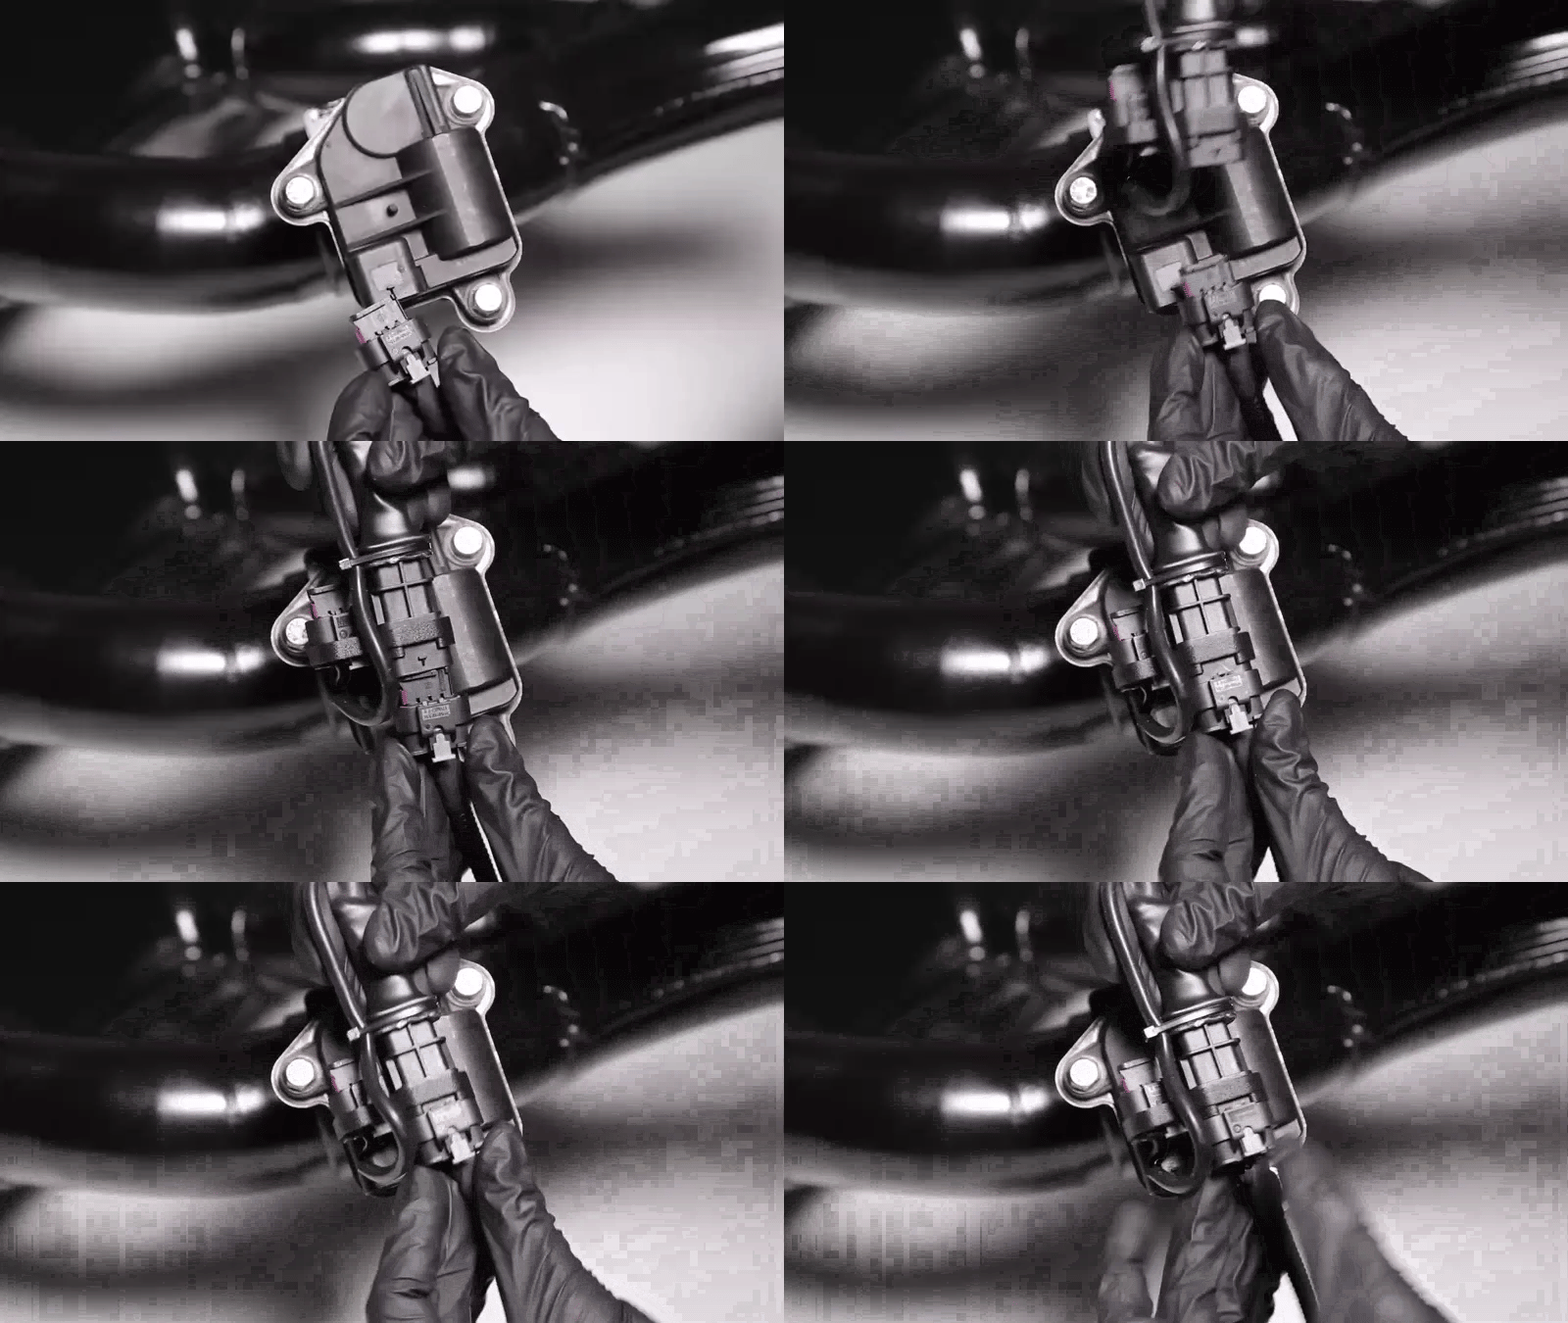
Plug the factory connector into the Exhaust Controller and press in the connector locking tab if it has one. You can usually hear a click sound as it connects.
Please make sure the connector is clean and dry. Dirt and moisture on and inside the connector or actuator can cause problems in the future.
If the locking tab isn't able to be pressed in, then the connector may not be connected properly.
The connector should not be able to come out.
-
Step 4
Plug in controller
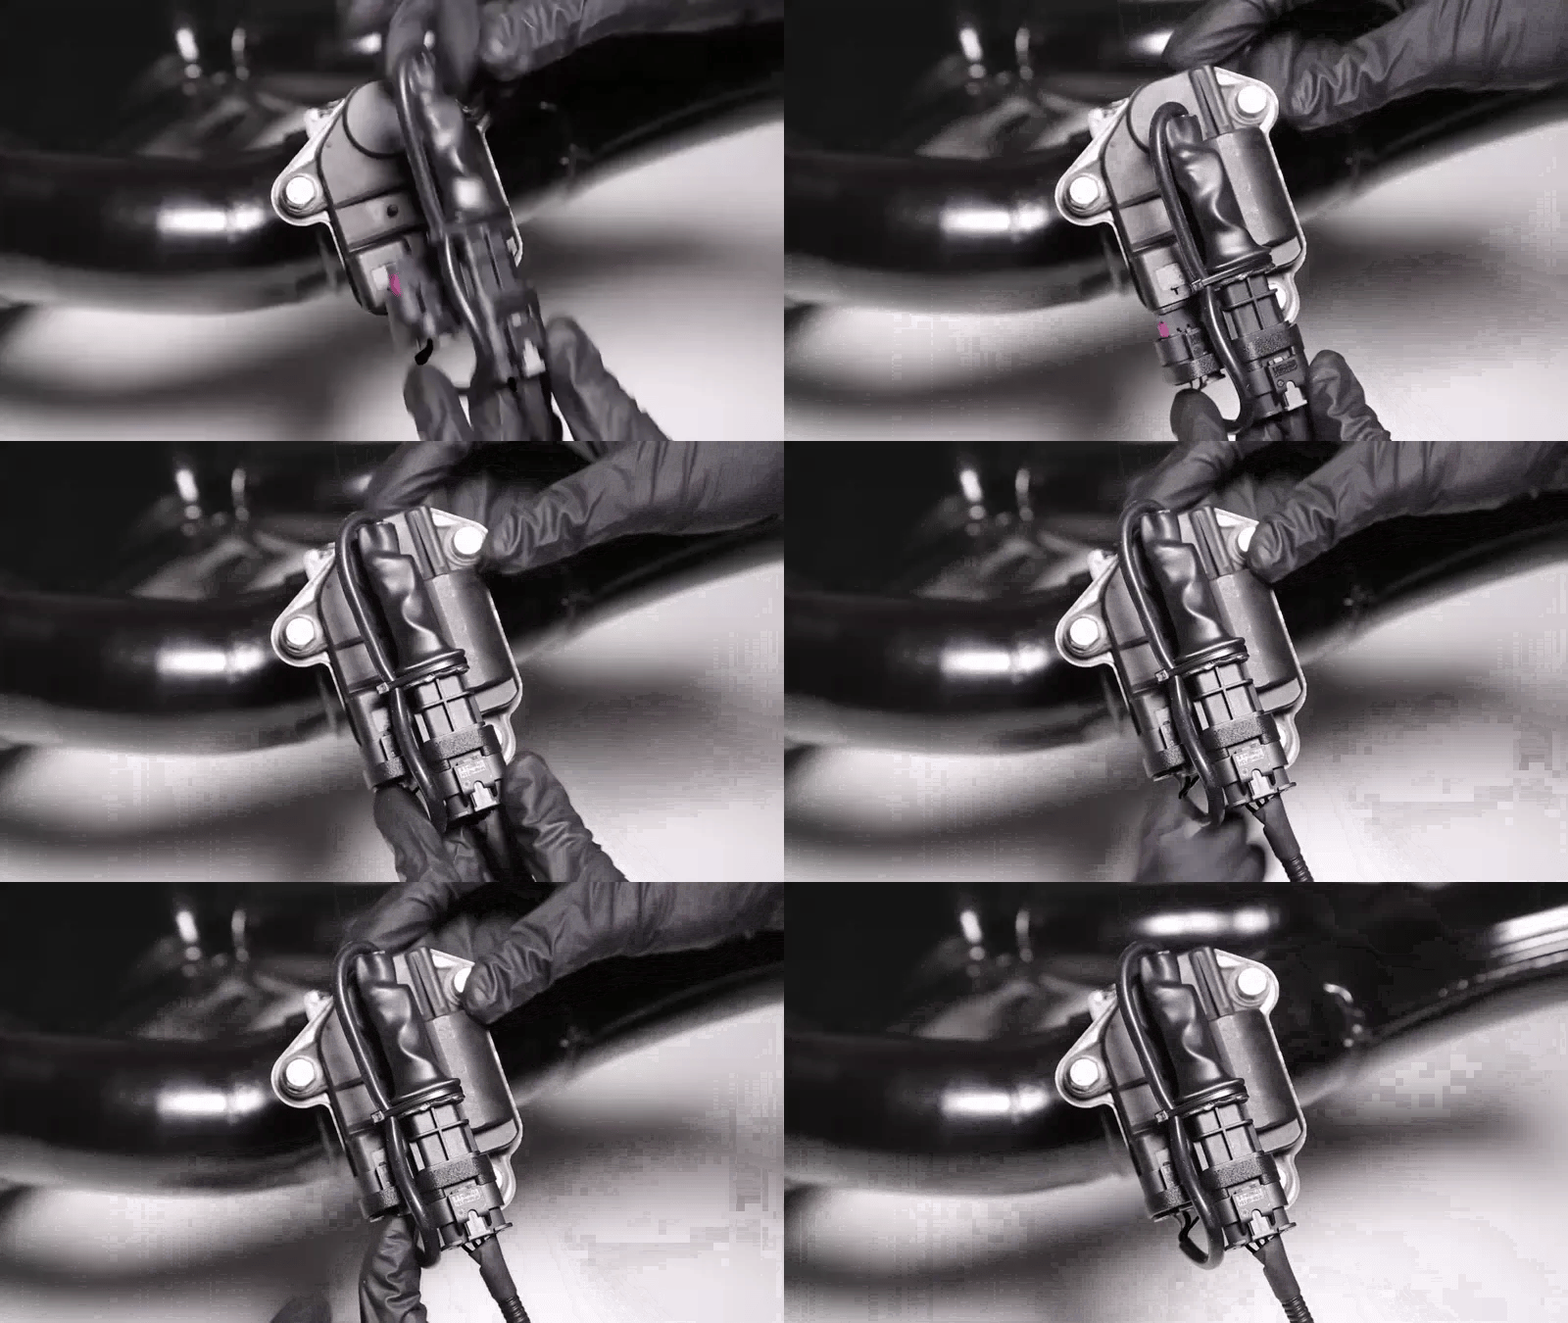
Plug the Exhaust Controller into the exhaust valve motor, and press in the locking tab. You can usually hear a click sound as it connects.
It should not be able to come out when pulling on the controller body or connector (do not pull the wiring).
-
Step 5
Quick check
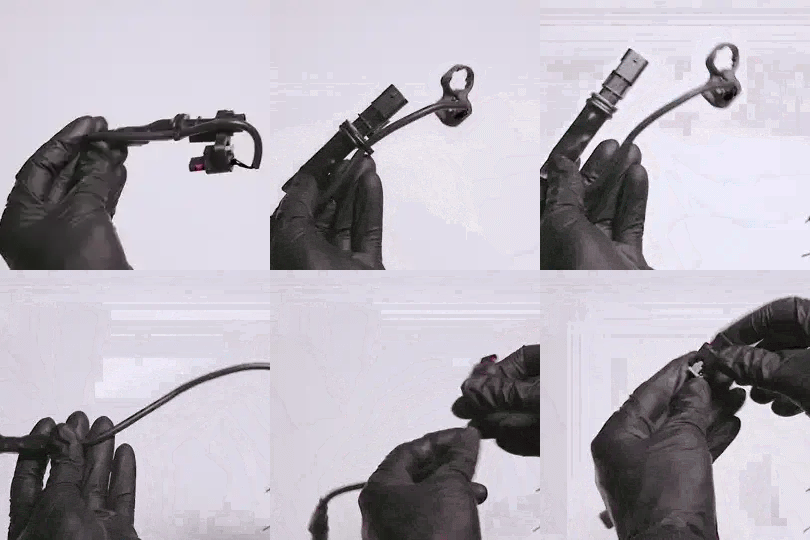
Take a moment to check that any part of the controller or wiring is not near the hot exhaust system, near anything sharp or where it could rub.
Note: if there's not enough space around the controller, where it's too close to the exhaust, something hot or where the controller or wire can rub, you can extend the controller (how to video here) and mount it elsewhere where it is more safe.
Please note improper installation can cause damage and is not covered under warranty.
-
Step 6
Send it
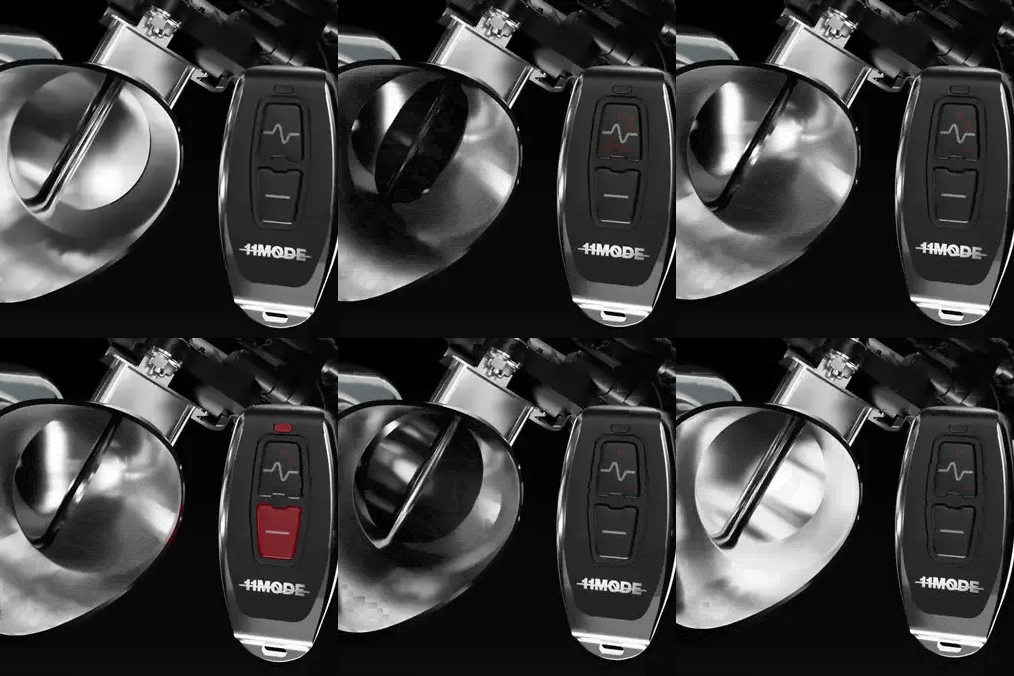
Repeat these installation steps for the other side if necessary. Both Exhaust Controllers can be used for either the left or right side.
Power on your car:
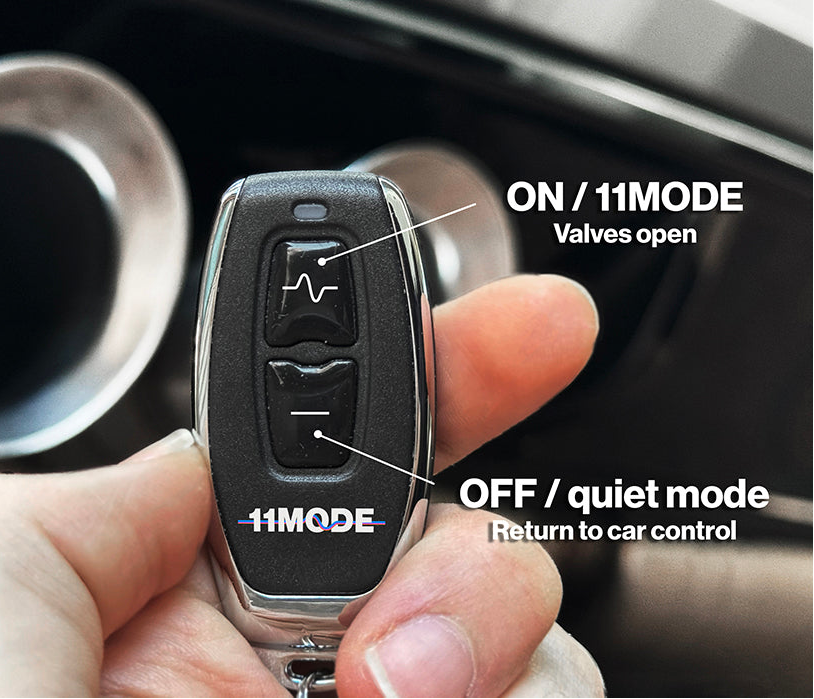
1. Press the ON ( ∿ ) button on the remote to keep the valves fully open
2. Press the OFF ( — ) to revert back to factory control
You may sometimes need to cycle the ON and OFF buttons a couple of times after powering on the car for the normal valve calibration sequence if necessary.
-
Step 7
Testing the controllers
Steps to test the controllers:
1. Start your car and leave the controller OFF.
2. Set the drive mode to the quietest mode (eco / comfort etc.).
3. Wait for the valves to close, then visually confirm they are closed*. You may need to use a torch to see inside.
4. Press the remote ON ( ~ ) button - the valves will open.
5. Press the remote OFF ( — ) button - the valves will return back to normal / controlled by the car (closed).
* If the valves are not confirmed to be closed first, the controller will look unresponsive, but it is simply switching between ON (valves kept open) and OFF (valves returned to normal - still open).
Points to remember
They will keep the valves fully open in any mode.
They do not force the valves closed (FAQ).
If the valves are already open, the controller will not move the valves.
They have a memory function that remembers its last setting (ON or OFF), automatically restoring it the next time you start the car. (FAQ).
If the car was not powered off fully when installing, it could store an error code or cause a CEL (FAQ).
See note for some Mercedes-Benz models.
Install Examples from Customers
These are examples only and may not show all necessary steps. Be sure to review the install guide for the complete process.
-
G87
-
G80
-
G80
-
G87
Installation Warning
Avoid routing wires or components near hot surfaces, moving parts, or areas where abrasion can occur. Improper installation can cause damage and is not covered under warranty.
Questions, answered
Frequently asked questions
Yes, it is possible to pair your controller remote to your HomeLink or garage door opener buttons (such as on the mirror or MMI).
You'll use one button to pair to the ON button and one button to pair to the OFF button.
The process will be similar to pairing any other remote with the same system. Please see the manufacturer's guide for your specific vehicle model for the full details.
Once the connector is fully pushed in and cannot be pulled out, then the locking tab will be able to be pushed in. You can try wiggling the connector and tab up and down or try pushing down on the tab while pushing it in. Some require a bit more effort than others as there are always slight variables in the connectors and mating connections.
Sometimes dirt and debris can prevent the locking tabs from being pushed in, so please make sure it is clean and try again.
You can also try pushing the bracket on further as it could be just ever so slightly protruding and making it harder to push the locking tab on.
Please note that any damages during installation are not covered by warranty so please take your time and be careful. It is recommended to consult a professional if you have troubles.
The valve actuators are usually located at the end of the exhaust system near the rear mufflers and exhaust tips.
You should be able to see a wiring harness running to the actuator.
Please note on some models there may be trim pieces that need to be removed to access the valves.
If you still cannot see any actuators, please check that you have a factory active exhaust system and have the same car as specified in the product description that you purchased. Feel free to send us pictures if you need confirmation. Alternatively it might be worth seeking advice from a workshop with ramps or a hoist who could get a better view.
Note: Exhaust Controllers can only be installed on valves that are specifically used for sound control as part of the muffler system on petrol models. Please do not install an Exhaust Controller on any valve located in the middle of the exhaust system. This is not for sound control and should not be interfered with. Diesel exhaust valves should also not be interfered with.
Depending on the car they will look something like these actuators pictured:

When installing an Exhaust Controller, it is important to be sure it is not too close to heat or touching anything where it could rub and cause damage.
So if there is not enough room to fit the Exhaust Controller or it is too close or touching something, you can extend the controller instead.
Heat Shields
Because heat shields are flexible, they can sometimes be formed or sit differently. If it is touching the controller, you can usually push it away to create more clearance.
Extending the Controllers
The controllers were designed to fit many different makes and models with factory and aftermarket exhaust systems. But sometimes there are variables that mean there are clearance issues, so we have designed it so that it can be extended.
Simply cut the cable tie then unclip the black bracket from the short connector and slide out the other long connector out of the bracket, as shown in the video below.
This will allow you to mount the Exhaust Controller elsewhere. You can secure it with cable ties somewhere away from anything hot or that is moving. Be sure to avoid any points where the wiring could rub and cause damage.
This is the trickiest part of the installation process, so don’t worry once these are removed, the rest is easier!
The connectors have little locking tabs that need to be pulled back (towards the wiring) a little. Sometimes dirt and debris can prevent the locking tabs from being removed so try removing it and try again. You can also try gently prying it with a small flat head screwdriver to unlock the tab. You should then be able to press down on the connector clip to release it.

Again, dirt and debris may cause this to get stuck so please clean this as well. You may also be able to gently pry it using a flat head screwdriver, making sure to be pressing down on the clip.

Example another type of OEM connector - the red arrow indicates where the release mechanism is,

Sometimes the connectors can be tight to push in. You can confirm the connector is properly seated and connected when you hear a click sound and you cannot pull it out without pinching the release mechanism. It should not come out by pulling on the connector (please do not pull on the wires).
Check it is clean
If it is difficult to plug in, check that there is no dirt or debris around the mating side and on the seals that is preventing it from connecting.
Also please make sure the connector and actuator are clean and dry. Dirt and moisture on and inside the connector or actuator can cause problems in the future.
Locking tab
Make sure that the locking tab is not pushed in until the connector is fully pushed it, as it'll prevent the connector from being plugged in.
Bracket
You can also try pushing the bracket on further as it could be just ever so slightly protruding and making it harder to push the connector on all the way.

Check the pins
However unlikely, you can also inspect the connector pins to make sure they have not been bent.
Any damages during installation are not covered by warranty so please take your time and be careful. It is recommended to consult a professional if you have troubles.
Find the controller that fits your car
Pick your make to see every controller, or add model and year to narrow it down.
Your whole garage, covered.
1,000+ models across 23 makes, from Audi to McLaren. Pick your car and see the exact controller that fits it.





-
BMW M3 (G80 / G81) Exhaust Controller
Regular price $379.00 AUDRegular price -
Audi RS3 (8Y) Exhaust Controller
Regular price $379.00 AUDRegular price -
BMW M2 (G87) Exhaust Controller
Regular price $379.00 AUDRegular price -
VW Golf R (MK7.5) Exhaust Controller
Regular price $379.00 AUDRegular price -
BMW M4 (G82 / G83) Exhaust Controller
Regular price $379.00 AUDRegular price -
Lamborghini Revuelto Exhaust Controller
Regular price $549.00 AUDRegular price -
Mercedes-Benz C-Class (W205 pre-facelift) Exhaust Controller
Regular price $379.00 AUDRegular price -
Audi RS3 (8V facelift) Exhaust Controller
Regular price $379.00 AUDRegular price -
Porsche 911 GT3 RS (992) Exhaust Controller
Regular price $549.00 AUDRegular price -
BMW M2 Competition (F87) Exhaust Controller
Regular price $379.00 AUDRegular price -
McLaren 720S Exhaust Controller
Regular price $549.00 AUDRegular price -
Mercedes-Benz A-Class (W176) Exhaust Controller
Regular price $379.00 AUDRegular price -
BMW M3 (F80) Exhaust Controller
Regular price $379.00 AUDRegular price -
BMW X3 M (F97) Exhaust Controller
Regular price $379.00 AUDRegular price -
BMW X5 M (F95) Exhaust Controller
Regular price $379.00 AUDRegular price -
Mercedes-Benz AMG GT / GTS (C190) Exhaust Controller
Regular price $379.00 AUDRegular price -
Mercedes-Benz AMG GTR / PRO (C190) Exhaust Controller
Regular price $379.00 AUDRegular price -
Mercedes-Benz CLA-Class (C117) Exhaust Controller
Regular price $379.00 AUDRegular price -
Mercedes-Benz S-Class (W222 pre-facelift) Exhaust Controller
Regular price $379.00 AUDRegular price -
VW Golf R (MK8) Exhaust Controller
Regular price $379.00 AUDRegular price -
Ford Focus RS (Mk3) Exhaust Controller
Regular price $379.00 AUDRegular price


